Find large files on a Mac with Finder or a disk-space analyzer
When a Mac is running out of storage, I start with the tools already in macOS. Storage settings can show large individual files, and Finder can calculate the sizes of folders in a list. That is often enough.
I use a disk-space analyzer when I want to choose one folder, scan its accessible contents once, and keep drilling through a largest-first hierarchy. SimplyDiskSweeper is my version of that workflow.
Start with macOS Storage
Open System Settings → General → Storage, then open Documents. The Large Files view lists large documents and lets me sort by size. File Browser shows how much storage different folders use.
This is the quickest built-in route when I do not yet know where the large file is. I can select a file and use Show in Finder before deciding what to remove.
Storage settings also show categories such as Applications, Photos, Messages, and iOS files. Those categories are useful for deciding which app should manage the data. A large Photos library, for example, is not a loose folder of disposable images.
Show folder sizes in Finder
Finder is better when I already know the folder I want to inspect.
- Open the folder in Finder.
- Switch to List view.
- Choose View → Show View Options, or press Command-J.
- Turn on Calculate all sizes.
- Click the Size column heading to put the largest items first.
Finder may need time to calculate a folder that contains many items. The setting applies to the Finder view I am using, and I repeat the same navigation as I open deeper folders.
For one folder, I can also select it and press Command-I to open Get Info. That gives me the folder’s total without changing the Finder view.
Match the built-in view to the question
I use Finder when I can name the likely location: Downloads, Documents, a project folder, or an external folder I already recognize. Calculating all sizes in that one list tells me which branch deserves a closer look.
I use Storage settings when I cannot name the location yet. Its Large Files view is better for finding individual documents across the categories macOS exposes. File Browser is better for stepping through folder totals without first opening the right Finder window.
The two built-in views do not always describe storage in the same way. Storage groups data by categories, while Finder shows filesystem items in the current location. I do not treat a category total, a folder total, and free disk space as interchangeable numbers.
For a large System Data category, start with what macOS System Data actually means. A folder total cannot account for that category by itself.
Neither built-in route bypasses macOS permissions. Finder can show only what the current user can access, and Storage settings deliberately leave some categories to macOS or the app that owns them. When an item is dimmed, unavailable, or part of a managed library, I keep that boundary instead of changing permissions just to make a cleanup list look complete.
When I use SimplyDiskSweeper instead
Finder works well for a known folder and a quick check. SimplyDiskSweeper keeps the size-first inspection going as I move through the hierarchy.
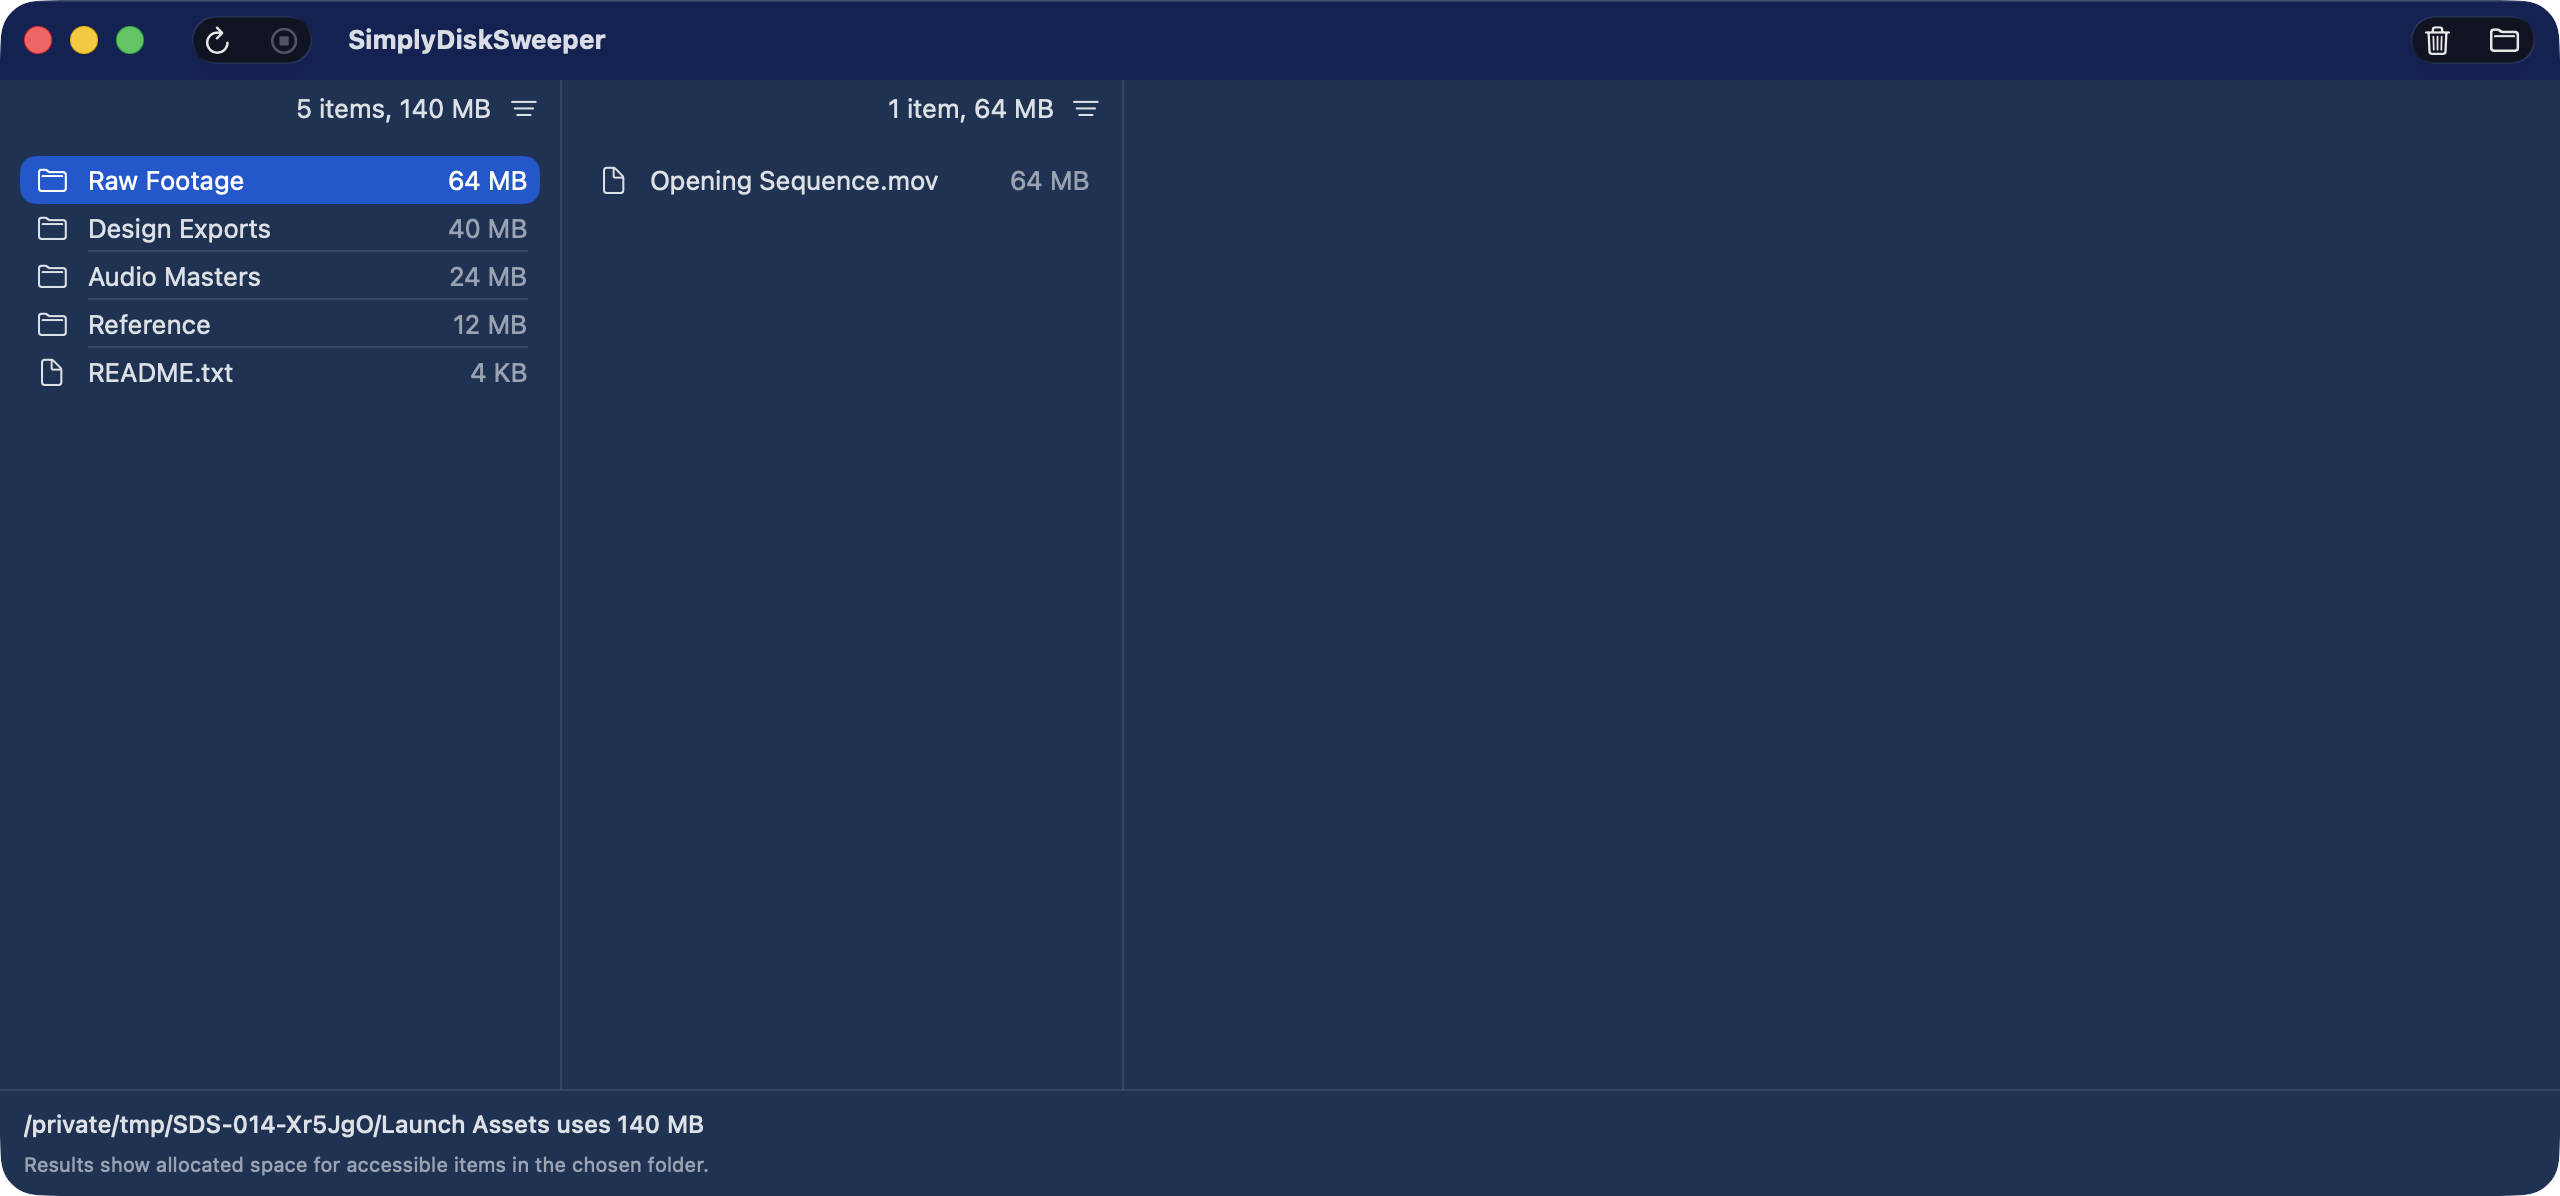
I choose one folder. SimplyDiskSweeper scans its accessible contents once, measures allocated space, and ranks each column from largest to smallest. I can open a large folder and continue into the next ranked column without asking Finder to calculate another view.
The selected scope matters. Choosing Downloads answers a Downloads question. Choosing a project folder answers a project question. SimplyDiskSweeper does not silently widen either scan into a whole-Mac result.
The app keeps the parent columns visible as I navigate. I can move back to a parent, filter the current column by name, or select more than one item in that column. The scan result stays available while I inspect those paths; I do not have to rebuild a separate size list for every level.
| Job | Finder and macOS Storage | SimplyDiskSweeper 0.16.0 |
|---|---|---|
| Find large individual files across common categories | Storage → Documents → Large Files | Starts from one folder I choose |
| Check one folder’s total | Finder Get Info | Included in the selected-folder scan |
| Compare folders in the current view | Finder List view with Calculate all sizes | Ranks accessible items by allocated space in every opened column |
| Follow a folder hierarchy | Open each folder and inspect its Finder view | Navigate the retained largest-first column hierarchy |
| Remove files | Move selected files to Trash in Finder, or use the available Storage action | Move only selected items to macOS Trash after confirmation |
SimplyDiskSweeper does not replace Finder or promise a complete account of the Mac. Inaccessible entries are outside its result. It does not claim APFS snapshot accounting, purgeable space, cloud-account totals, unique physical blocks, or guaranteed reclaimable bytes.
Finder and Storage settings remain the better tools when I need a built-in answer, an individual file search, or a system category. A paid analyzer has to save enough repeated navigation to justify its price.
Check before moving anything
A large file is not automatically safe to delete. Before I move one, I check what created it, whether an app expects it to remain in place, and whether I have another copy.
Downloads, old installers, exports, and archives I created are useful places to start. I am more careful with photo libraries, virtual machines, app support folders, and anything under ~/Library or a system folder.
Finder moves an item to Trash when I drag it there or press Command-Delete. SimplyDiskSweeper moves only the items I selected, and it shows a confirmation first. In both cases, the space may not become available until Trash is emptied. I check the Mac and my important apps before doing that.
Allocated size is also not a promise about the next free-space reading. Snapshots, clones, cloud-managed files, purgeable data, and items still in Trash can change that relationship. I move a small group, check what still opens, and then inspect the Mac’s available storage again.
The order I use
I keep the first pass narrow:
- Open Storage settings and check Large Files when I do not know where to start.
- Use Show in Finder or open the folder I already suspect.
- Turn on Calculate all sizes and sort that Finder list by Size.
- If repeating the calculation and navigation is slowing the inspection down, choose that folder in SimplyDiskSweeper and use its ranked columns.
- Preview or open each item I am considering. Move only a small selection to Trash.
- Check the affected app or project, inspect available storage again, and empty Trash only after I am sure.
This order keeps Finder as the default. SimplyDiskSweeper enters when the same folder-by-folder calculation becomes the work, not merely because a storage number looks high.
I also stop when the large item belongs to an app-managed library or a storage category I do not understand. The right next step may be the app’s own cleanup command, an archive, or a backup. A different size browser does not make that decision for me.
Which route to use
Use macOS Storage first when the question is simply “what large files can I find?” Use Finder when the likely folder is already known and calculating one list is enough.
Use SimplyDiskSweeper when I want one selected-folder scan, allocated-space ranking, and the same largest-first navigation at each level. For visual maps, whole-disk questions, older macOS releases, or free alternatives, the Mac disk space analyzer comparison covers the different trade-offs.
Sources
- Apple: Find and delete files on your Mac
- Apple: Get file, folder, and disk information on Mac
- Apple: Sort and arrange items in the Finder
- Apple: Delete files and folders on Mac
- SimplyDiskSweeper product page
- SimplyDiskSweeper US Mac App Store listing
SimplyDiskSweeper 0.16.0 costs US$14.99 upfront and requires macOS 15 or later.